Hardwood Jewelry Boxes – Add Class

Natural Wooden Crafting

Wooden boxes have long captured our attention and held a special place in our hearts. But why? No one can deny that wooden crafted items catch our attention, whether by the natural nature of the pieces, or by other means. These beautifully crafted containers can serve\ a myriad of purposes, from storing precious items to preserving treasured memories. Let dive into this subject and explore the enchanting world of wooden boxes, their diverse uses, and the timeless charm they bring to any setting.

Versatile and Functional


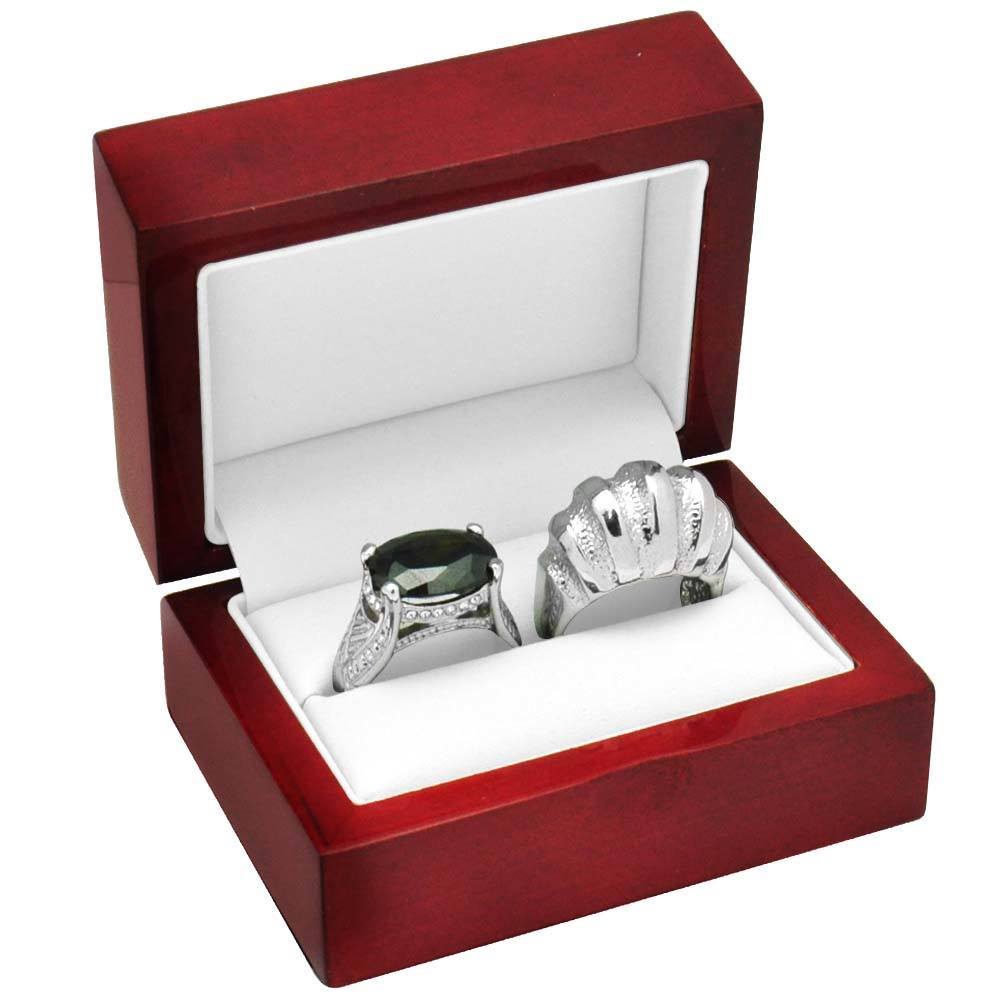
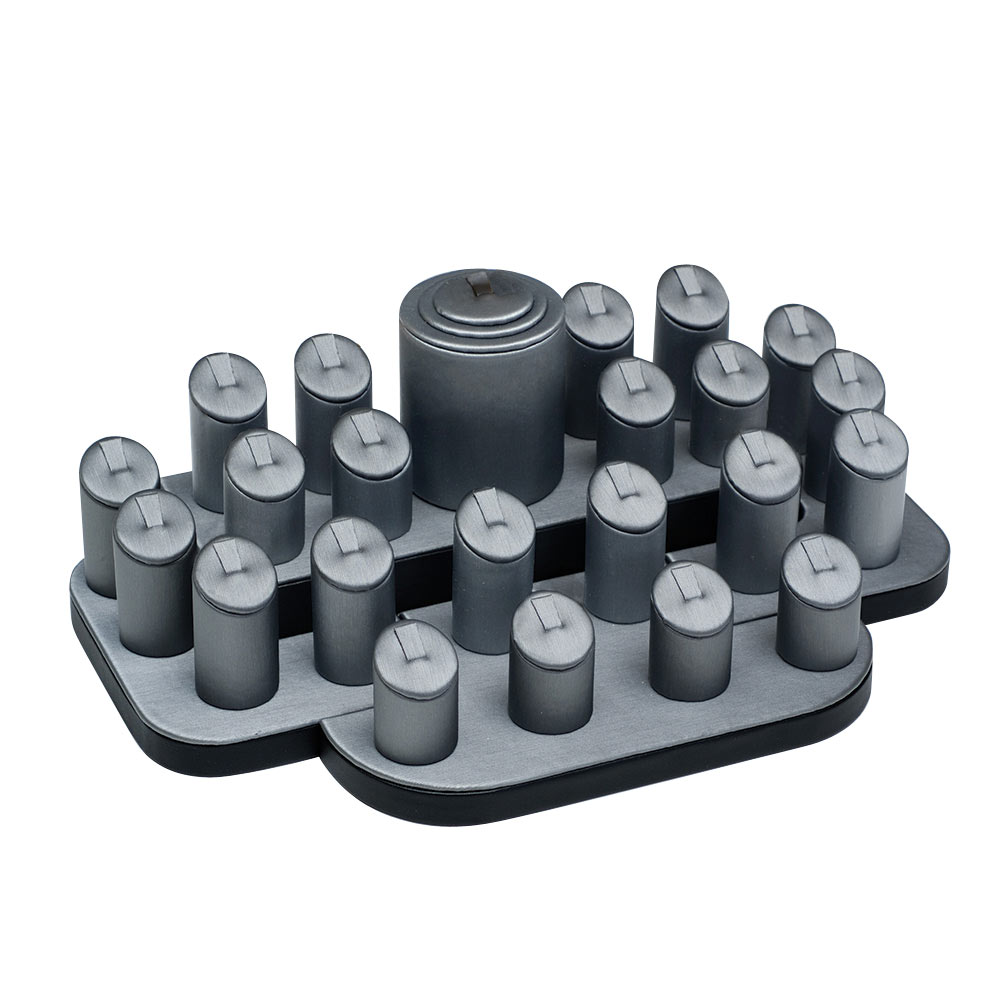
Red Rosewood Dual Jewelry Ring Gift Packaging Boxes

One of the remarkable aspects of wooden boxes is their versatility. They come in various shapes, sizes, and designs, making them suitable for a wide range of uses. Some of the options we offer for wooden boxes are wooden organizers and solid wood boxes for your merchandise. They serve both practical and aesthetic purposes. No one can deny hardwood boxes offer a classy look and feel. Additionally, their durability and ability to withstand the test of time make them an excellent choice for storing delicate and precious items.

Natural Beauty and Unique Character


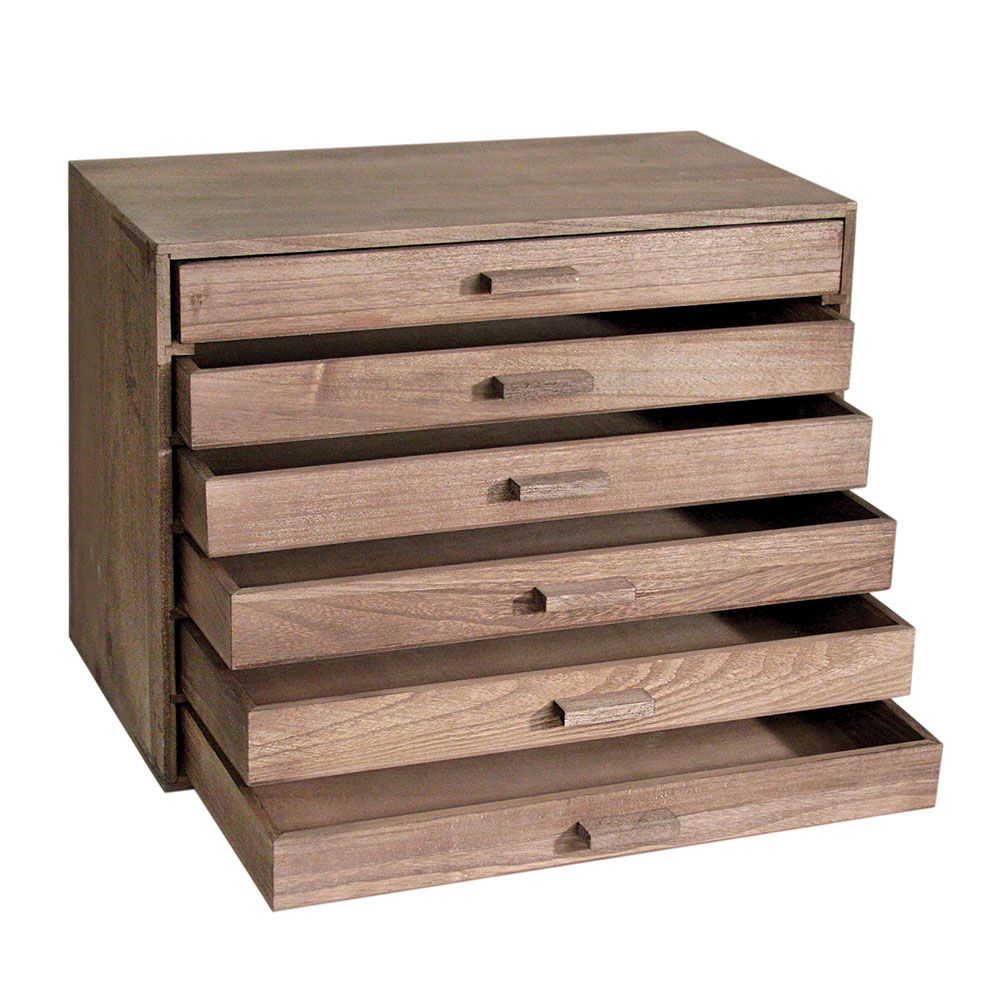
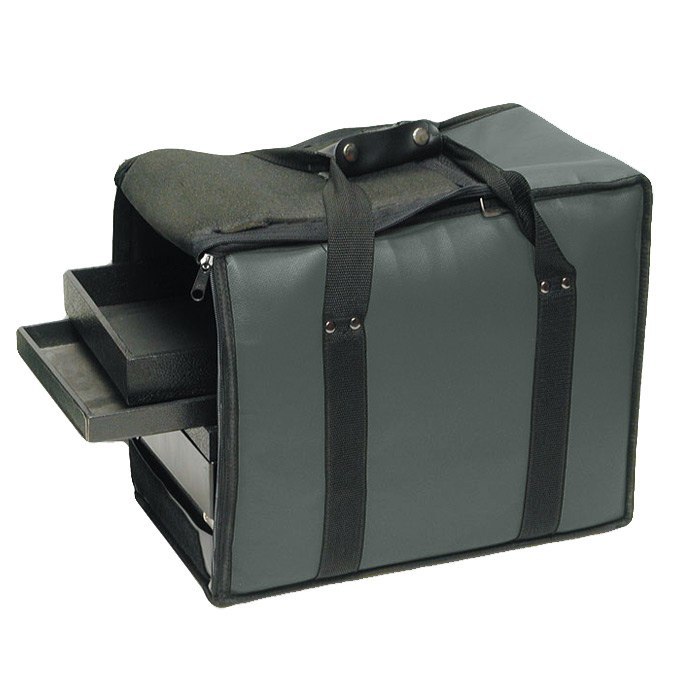
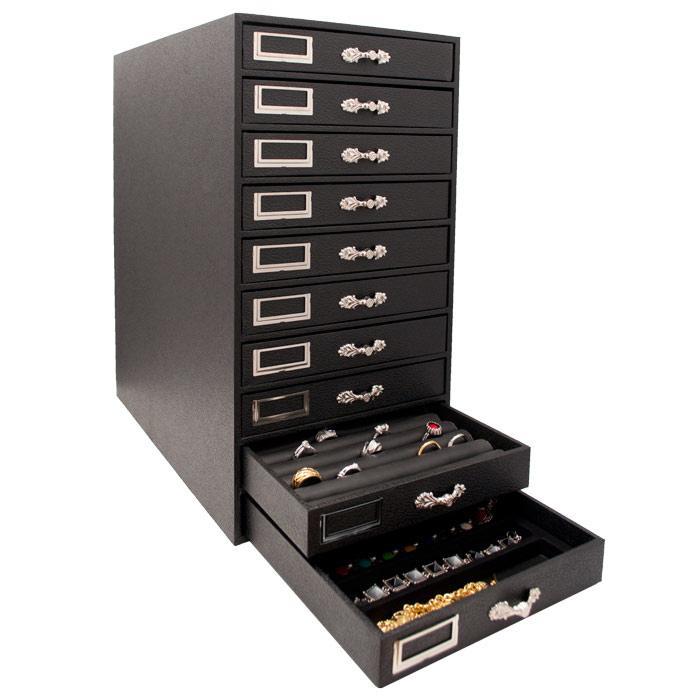
Antique Ash Wood 6 Drawer Jewelry Tray Organizer

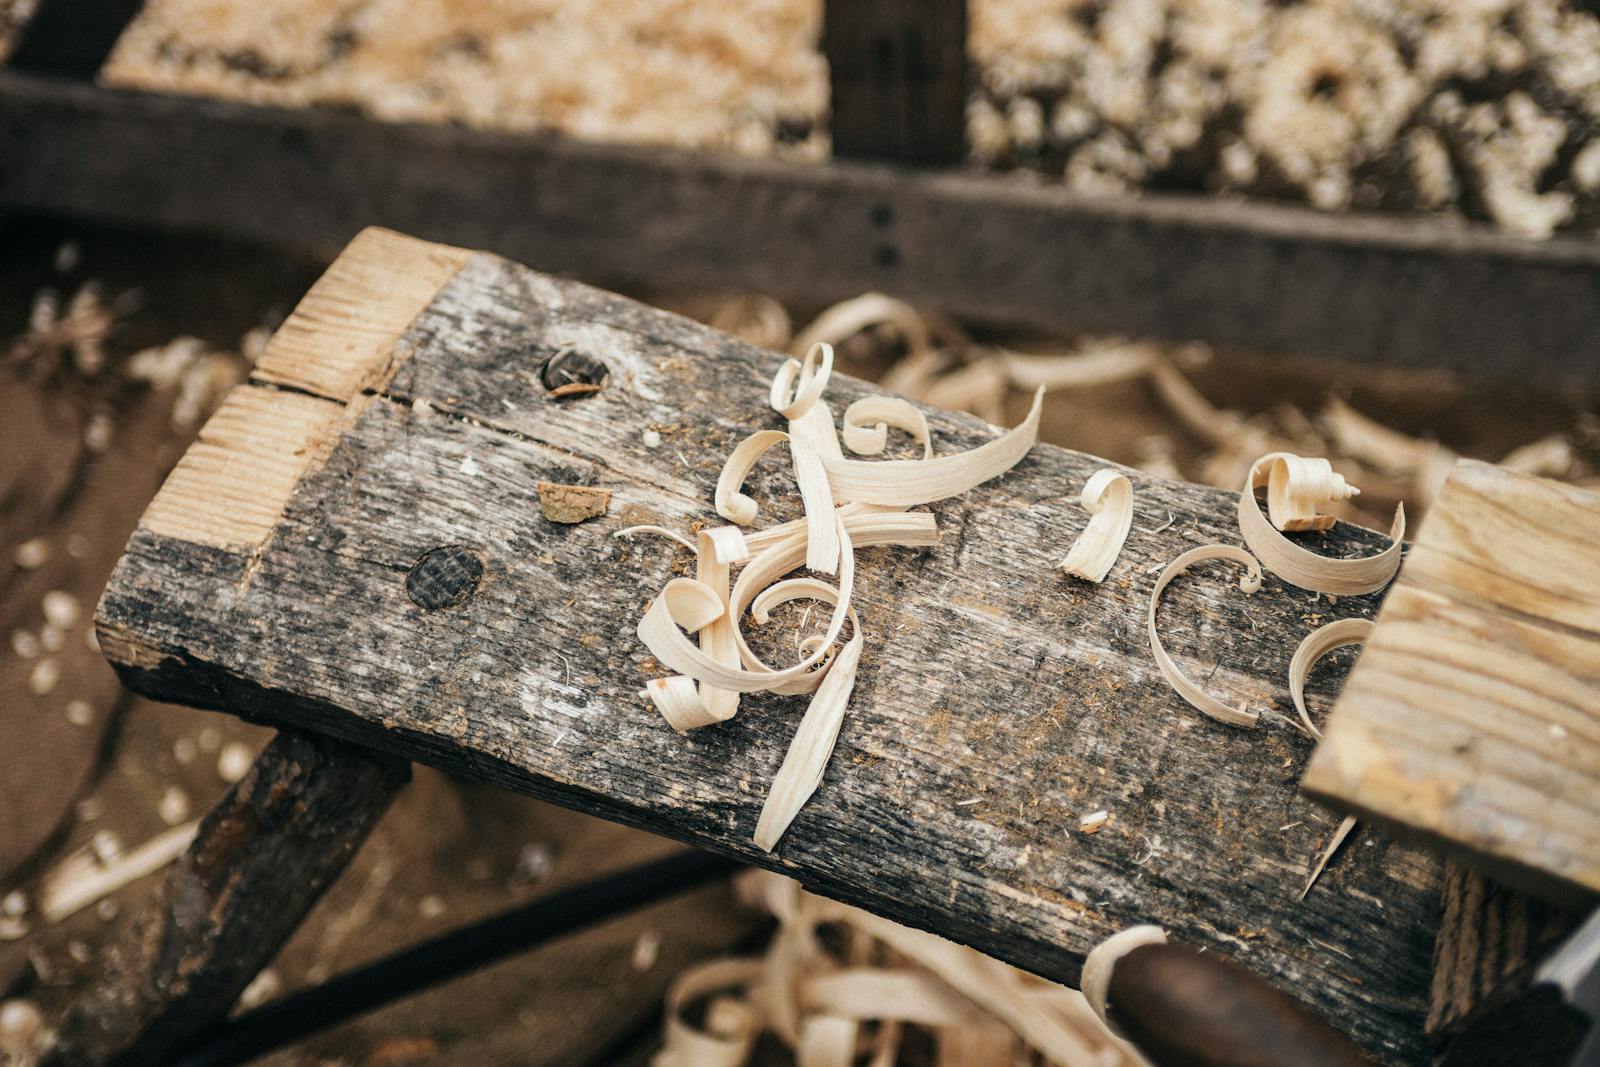
The natural beauty of wood is a significant factor that contributes to the timeless appeal of wooden boxes. Each piece of wood has its own distinctive grain patterns, colors, and textures, making each box a unique work of art. This can be seen in the rosewood boxes the most. The wood grain pattern is very pronounced. Whether crafted from oak, mahogany, cedar, or other types of wood, these boxes exude a sense of warmth and sophistication that cannot be replicated by other materials.

Preserving Memories and Sentimental Value


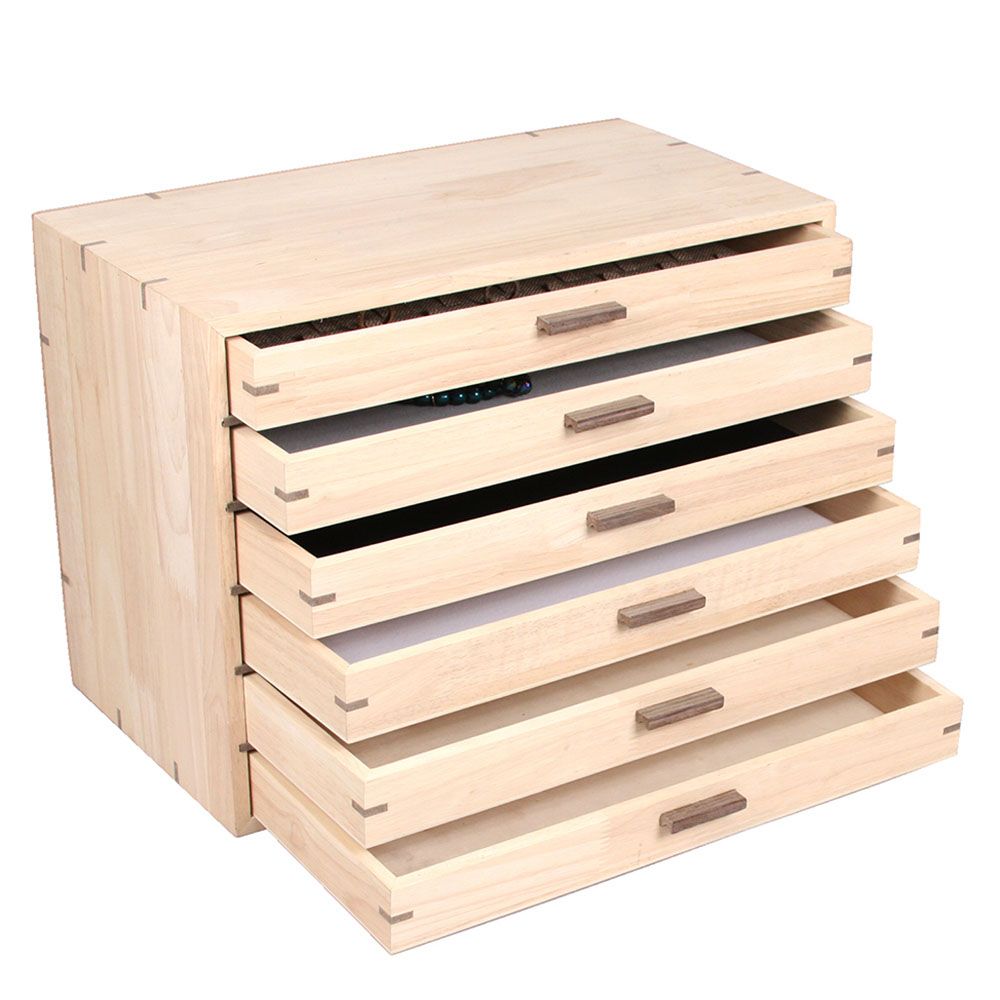
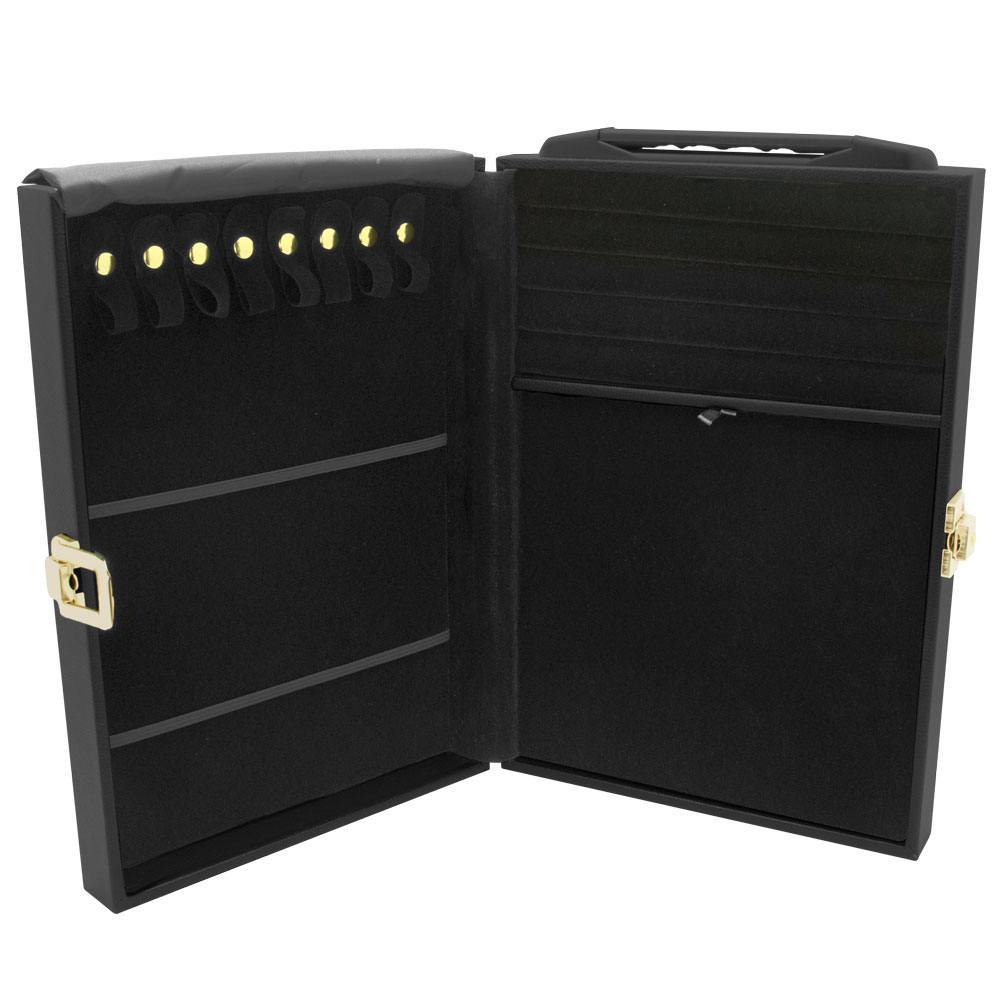
Natural Wood 6 Drawer Jewelry Tray Organizer

Wooden boxes have long been associated with cherished memories and sentimental value. They provide a safe and secure space to store precious mementos, family heirlooms, and personal treasures. I personally recommend the wooden organizers for this endeavor. You want space for mementoes like that. Opening a wooden box filled with nostalgic items can evoke a flood of emotions and transport us back to a specific time or place, making them a truly special possession.

Mic Drop

Wooden boxes possess a timeless allure that transcends generations. Their versatile nature, and natural beauty make them a treasure worth preserving. Whether used for practical purposes or as decorative pieces, these boxes continue to captivate our imagination and serve as a testament to the enduring artistry of woodworking. So, the next time you come across a beautifully crafted wooden box, take a moment to appreciate the craftsmanship and the stories it holds within its wooden embrace.

Be a Creative Phoenix – A Step-by-Step Guide to Wire-Wrapped Jewelry Making

Release your inner Wire-wrapped jewelry is a beautiful and versatile craft that allows you to transform simple wire into stunning pieces of wearable art. By using various techniques and incorporating gemstones, beads, or crystals, you can create unique jewelry that reflects your personal style. In this blog post, we will take you through the process of wire-wrapped jewelry making, providing you with the knowledge and inspiration to get started on your own handmade creations.

Materials Needed: Before we begin, let’s gather the essential materials for wire-wrapped jewelry making:

  1. Wire: Choose a suitable wire for your project, such as copper, sterling silver, or gold-filled wire. Select a gauge that matches your desired level of durability and flexibility.
  2. Gemstones, Beads, or Crystals: Pick your favorite stones or beads to incorporate into your designs. They can be the focal point of your jewelry or serve as accents.
  3. Wire Cutters: A good pair of wire cutters is essential for cleanly trimming the wire.
  4. Round-Nose Pliers: These pliers have rounded tips, ideal for creating loops and curves in the wire.
  5. Chain-Nose Pliers: These pliers have flat tips and are used for gripping and manipulating the wire.
  6. Optional: Jewelry findings like jump rings, clasps, and ear wires, if you plan to create complete jewelry pieces.

Step-by-Step Guide:

  1. Plan Your Design: Start by sketching or visualizing the design you want to create. Consider the type of jewelry (e.g., pendant, earrings, bracelet) and the placement of stones or beads within the wire frame.
  2. Cut and Straighten the Wire: Measure and cut a piece of wire according to your design. Use your wire cutters to create a clean, straight edge.
  3. Create a Wire Frame: Use your round-nose pliers to make a loop at one end of the wire. This will serve as a base for your design. Begin shaping the wire according to your design, using chain-nose pliers to make bends, curves, or spirals.
  4. Secure Stones or Beads: If you are incorporating gemstones or beads, position them within the wire frame. You can wrap the wire around the stone or create prongs to hold it securely. Experiment with different wrapping techniques to achieve the desired look.
  5. Add Decorative Elements: Enhance your design by adding additional wire embellishments, such as coils, swirls, or weaving. Use your pliers to manipulate the wire and create intricate patterns.
  6. Finish and Secure the Wire: Once you’re satisfied with the design, make sure all wire ends are neatly tucked or wrapped to avoid any sharp edges. Use chain-nose pliers to press the wire firmly, ensuring a secure finish.
  7. Attach Findings (Optional): If you want to turn your wire-wrapped creation into wearable jewelry, use jump rings, clasps, or ear wires to attach the appropriate findings. Open and close the jump rings carefully using your pliers to ensure a secure connection.
  8. Polish and Clean: Use a jewelry polishing cloth or a suitable cleaning solution to remove any tarnish or fingerprints from your finished piece. This step will give your wire-wrapped jewelry a professional and polished appearance.

Conclusion: Wire-wrapped jewelry making is a delightful and fulfilling craft that allows you to express your creativity and create one-of-a-kind accessories. By mastering wire manipulation techniques and combining them with gemstones or beads, you can produce stunning pieces that reflect your unique style. Remember to start with simple designs and gradually explore more complex techniques as you gain confidence. So, gather your materials, let your imagination run wild

If you need some inspiration, please see the videos

The Elegant Art of Crafting Pens

Pen Turning Masterpieces

There is something uniquely satisfying about putting pen to paper. Today, everything has been digitized to the point where interacting with a physical media offers a unique delight to the senses. Therefore, what better way to enhance that experience than by using a pen that you’ve crafted yourself or perhaps purchased from a local artisan? Handmade pens not only serve as functional writing tools but also offer a personal touch and an expression of creativity. So whether you are giving a gift OR just making something small for yourself, pen turning (or lathe turning) is a great hobby to get into. But, where to start? How to get into this at all? Well, let’s look at the practice step-by-step. Or you could check out the following video to assist with your lathing journey.

Materials Needed: Before we dive into the process, let’s gather the materials required for making a pen:

  1. Pen Kit: This typically includes the pen components, such as the pen body, refill, clip, and end cap. These can be found at your local hobby store.
  2. Pen Blank: Let’s dive a little into the term “Blank”. A blank is a block of material (wood, acrylic, epoxy resin, or metal) that will for the main body of the pen. So, select a material that reflects your likes.
  3. Lathe: A machine used to shape and turn the pen blank. This practice is also called “Turning”. This machine is VERY versatile in it’s use, but commonly used for pens, bowls, and candle stick holders (amongst other things)
  4. Sandpaper and Finishing Materials: Various grits of sandpaper for smoothing and polishing the pen, along with a suitable finish, such as wax or varnish. Here’s where a bit of creativity in your medium can flow. You can choose different finishing that produce different effects. I would recommend Googling and planning out your desired end result.
  5. Adhesive: Usually, cyanoacrylate glue (also known as CA glue) is used for securing the pen components. This is VITAL to your project. Don’t skimp and don’t rush the gluing process.

Step-by-Step:

  1. Prepare the Pen Blank: Select the desired material for your pen blank and cut it to the appropriate length. Ensure that it is slightly longer than the pen kit to allow for trimming. Many of these pen kits recommend certain sizes to start with, so make sure you read the instructions provided by your pen kit.
  2. Drill the Blank: Mark the center of the pen blank and use a drill press to create a hole that matches the diameter of the pen kit’s tube. Be cautious and wear appropriate safety gear during this step. Go slowly, take your time measuring your materials. Remember, measure twice, cut once.
  3. Mount the Blank on the Lathe: Secure the drilled blank onto the lathe using a pen mandrel. Make sure it is aligned properly to prevent wobbling during turning.
  4. Shape the Pen: Switch on the lathe and use appropriate turning tools to shape the blank. This will depend on the type of shape you would like your pen to take. Many different textures and shapes can be achieved in this portion of the project. So plan ahead. A sketch of the desired shape wouldn’t hurt. Begin by roughing out the basic design and gradually refine it to your desired shape. Take your time and pay attention to detail, ensuring a smooth and symmetrical finish.
  5. Sanding and Finishing: Start with coarse-grit sandpaper and progress to finer grits, gradually smoothing the pen’s surface. Use a sanding block or lathe-mounted sandpaper for even results. Once satisfied with the smoothness, apply a suitable finish to enhance the pen’s appearance and protect the material.
  6. Assemble the Pen: Following the pen kit’s instructions, carefully insert the pen components into the blank. This typically involves attaching the refill, clip, and end cap using the provided mechanisms. Use CA glue sparingly and avoid getting it on the visible surfaces of the pen.
  7. Final Touches: Check the pen for any rough edges or imperfections. If necessary, use sandpaper or a file to make small adjustments. Clean the pen to remove any dust or debris.
  8. One extra step you could explore is the use of a lovely pen box. This will provide protection, and a finishing touch to your project. We recommend our Gems On Display exclusive pen boxes. Please see the pen box below.

Matte Black Single Pen Boxes, Holds 1 Pen – SKU#: 80B-1

Crafting your own pen is an immensely rewarding experience that allows you to create a functional work of art. Whether you choose to work with wood, acrylic, or other materials, each pen becomes a unique expression of your creativity. With practice and patience, you can refine your pen-making skills and even experiment with different designs and techniques. So, why not embark on this journey and discover the joy of making pens by hand? Let your creativity flow and enjoy the elegant simplicity of writing with a pen that you’ve crafted with your own hands.

See Our Happy Reviews for Pen Boxes

An Honest Pen Box Review

Earring Card – Humble Packing with a Large Impact

Shimmer White Earring Card With Keyhole 2″ x 3″ Rounded Corner

Looks are important in this physical world. The realm of jewelry is no different. One can deny, presentation plays a crucial role in attracting customers and showcasing the unique beauty of each piece. Earring cards are a humble little addition that are designed specifically for earrings, which an excellent tool for both retailers and individual artisans i.e. the Etsy sellers. Strap in, we will explore the art of earring cards and provide you with essential tips and ideas to create eye-catching displays that will enhance the allure of your earrings. We are going to discuss the following topics: the benefits of earring cards,

Purpose and Benefits of Earring Cards

Kraft Earring Card 1-3/4″ x 2-1/2″

Earring cards serve multiple purposes. They offer a practical way to organize and protect earrings while providing an appealing platform for presenting your creations. The advantages of using earring cards include: visual appeal, branding, and organization. Visual appeal: Earring cards add a professional touch to your jewelry display, making them visually appealing and enticing to potential customers. Branding and personalization: Customized earring cards allow you to incorporate your logo, brand colors, and unique designs, helping to establish brand recognition and stand out from the competition. Organization and storage: Earring cards make it easy to categorize and store your earrings, ensuring they remain in good condition and are readily accessible.

Choosing the Right Earring Card

Black Earring Card 1-9/16″ x 15/16″

Selecting the appropriate earring card is essential for effective presentation. Consider the following factors: Material: Earring cards are commonly made from cardstock, Kraft paper, or premium materials like velvet or leather. Choose a material that aligns with your brand aesthetic and provides durability. Size and shape: Earring cards come in various sizes and shapes, such as rectangles, squares, circles, or custom die-cut designs. Select a size that accommodates your earring designs without overpowering them. Color and design: Opt for colors that complement your jewelry. Neutral tones often work well, but don’t shy away from incorporating your brand colors or experimenting with vibrant hues to create a captivating display.

Designing Your Earring Cards

Black Jewelry Card 2″ x 3″ Rounded Corner

Logo and branding: Incorporate your logo, brand name, or tagline on the earring cards to enhance brand recognition and make a lasting impression. Display options: Explore different ways to attach earrings to the cards, such as using adhesive dots, small holes, or earring slits. Experiment with different display techniques to find what best highlights your jewelry. Information: Consider including essential details like the materials used, care instructions, or a short description of the earrings to provide customers with additional information and enhance the perceived value.

Presentation and Display Ideas

Insert-Earring-3×3-MWH

Consistency: Maintain a consistent theme or design across your earring cards to create a cohesive and professional display. Card holders: Utilize card holders or display stands to showcase your earring cards effectively. These can be made of acrylic, wood, or other materials that match your brand style. Creative arrangements: Experiment with different arrangements, such as grouping earrings by color or style, to create visually appealing and enticing displays. Packaging and Gifting: Earring cards also serve as excellent packaging options for gifts or online orders. Consider adding a small bag, box, or envelope that complements the earring cards and ensures a memorable unboxing experience for your customers.

Fold-25X5-MATTEG

Earring cards are not just functional tools; they are an opportunity to elevate your jewelry presentation and create a lasting impression on customers. By carefully selecting the right materials, designing captivating layouts, and considering creative display options, you can enhance the visual appeal of your earrings and establish a strong brand presence. Invest time and effort in the art of earring cards, and watch as your jewelry collection captivates the hearts of customers near and far.

Jewelry Bags – Essential to your Store

M947-Silver

Jewelry bags are an essential accessory for anyone who wants to keep their precious jewels organized and safe. Whether you’re traveling, storing your jewelry at home, or giving a gift to a loved one, a jewelry bag can help protect your valuable items from damage and ensure they stay in pristine condition. In this blog post, we’ll explore the benefits of using jewelry bags and provide tips on how to choose the right one for your needs.

Packaging Solutions – A Safety Measure

Grey Water Resistant Jewelry Tray Carrying Case, Holds 12 1″ Trays

First and foremost, jewelry bags provide a safe and secure solution for your jewelry. A customer needs a reliable and safe way to transport his or her jewelry. Jewelry bags are a great option for this need. They come in a variety of sizes, shapes, and materials, including velvet, satin, and leather. Jewelry pouches are also a great option for this demand. Many jewelry bags feature nifty characteristics such as roped handles, cinching tops, and more.

Keep It Moving

Black Jewelry Attache Case for Necklace / Chains, Rings and Bracelets

Aside from allowing Jewelry bags are also a convenient way to travel with your jewelry. They can be easily packed in a suitcase or carry-on bag, and some styles even include a hook or loop for hanging in a closet or bathroom. By keeping your jewelry organized and in one place, you can save time and avoid the frustration of searching for lost or misplaced items.

Tailor It To YOUR Needs

8-3/8″ x 12″ Reusable Black Fabric Handle Gift Grocery Shopping Bags

When choosing a jewelry bag, there are a few things to keep in mind. First, consider the size and shape of your jewelry. If you have larger items such as necklaces or bracelets, you may need a bag with longer compartments or pockets. If you have many small items such as earrings or rings, a bag with multiple compartments or slots may be more suitable.

Material – Color – Think About It

Beige Linen Drawstring Gift Pouches

Another factor to consider is the material and design of the jewelry bag. Some materials are more durable and protective than others, so if you’re traveling frequently or need extra protection, look for a bag made of a thicker material such as leather. Additionally, some jewelry bags feature a stylish or decorative design, which can make them a great gift for someone special.

Over and Out

In conclusion, jewelry bags are a must-have accessory for anyone who wants to keep their jewelry safe and organized. By choosing the right size, shape, and material for your needs, you can ensure that your valuable items are protected and easy to access. Whether you’re traveling or storing your jewelry at home, a jewelry bag is a convenient and stylish solution that can help you make the most of your collection.

Packaging Sleeves – #33

When branding and building your business, customization should always be a near-future goal. However, sometimes a business owners doesn’t have the expendable income to invest into this added touch of professionalism. How does $15.89 sound? For only $15.89, you can encompass your boxes with a custom printed wrap. No one can debate: Box wraps are a popular packaging option for businesses looking to create a professional and cohesive look for their products. These wraps provide a clean and polished appearance that can help attract customers, build brand awareness, and increase sales. Some benefits to boxes wraps include: Building Brand Awareness, Affordability, and Shipping solutions. Do you have your snorkel ready? Let’s dive into this.

Be a Chess Player – Plan a Strategy

Point one, first and foremost, your packaging should be a goal-orientated strategy. I can hear the response: What do you mean ‘strategy’? Well, dear reader, your boxes should fill a need or meet a personal goal you have set for your boxes. The main focus is to build brand awareness when investing in a custom wrap. For example: If you have a pantone color your business uses, your packaging should have this color sprinkled throughout. A great example of this concept is Tiffany Teal. As soon as you read that, your mind pops an image of the color, then the brand. With a customized wrap, your business can achieve this same effect. Your logo, contact info, and colors can be emphasized and reinforced with a smooth and fashionable sleeve addition. Summing up here: Box wraps can be customized with a variety of designs and colors, allowing you to create a look that’s unique to your brand.

Don’t Break the Bank

Another factor to consider when deciding on a box wrap is affordability. A packaging should promote your business, not bankrupt it. When customizing your boxes, $15.89 for a full color sleeve is a very reasonable price. Depending on the printing method used, the prices for dies/plates ALONE can cost upwards of $50-$100. This is a steep bill for small runs, smaller batches, or smaller businesses. This is another reason full color customized sleeves are a great solution for the average consumer. Start up businesses are looking for an affordable small run solutions, sleeves are this solution.

An Excellent Shipping Box

When shipping to your customer, I am sure you’ve experienced the dreaded transit damage. This is a pretty common occurrence, and it’s also pretty avoidable as well. By carefully packaging your merchandise prior to to shipping, damage such as scuffs, tarnish, and missing items may be avoided. Box wraps provide this protection. By packing your items in one of our anti-tarnish boxes and finishing the look with the custom printed sleeves, you can achieve a fairly simple yet effective shipping solution.

Let’s Wrap This Up: Closing Thoughts

In conclusion, box wraps are a simple investment with a high potential return. By choosing the right design, you can help attract customers and creating a memorable and distinctive look for your brand. This is a small investment as will, only setting you back $15.89 per 100. And finally, this provides a great shipping solution as well.

Traveling Cases – Think About It


Aluminum Jewelry Tray Carrying Case with Wheels, Holds 24 1″ Trays

Traveling with heavy luggage can be a hassle, especially when you have to lug it around from one place to another. This is where traveling cases with wheels come in handy. These cases are designed to make traveling with heavy items, like luggage, more manageable and less strenuous. In this blog post, we will explore the benefits of traveling cases with wheels and provide tips on how to choose the right one for your needs.


Jewelry Tray Carrying Case with Wheels, Holds 12 1″ Trays

One of the main benefits of traveling cases with wheels is their convenience. These cases are equipped with wheels, making it easy to transport heavy items from one place to another. This is especially useful when you’re traveling long distances or if you have a lot of luggage to carry. The wheels on these cases make it possible to move your luggage around without having to strain your back or arms.


Grey Water Resistant Jewelry Tray Carrying Case, Holds 12 1″ Trays

Another benefit of traveling cases with wheels is their durability. These cases are designed to withstand the wear and tear of travel, so you can be confident that your belongings will be safe and secure during transit. Many cases are made with high-quality materials, like polycarbonate or aluminum, which are lightweight yet strong enough to protect your belongings from damage.


Deluxe Black Canvas Jewelry Tray Carrying Case, Holds 10 1″ Trays

When it comes to choosing the right traveling case with wheels, there are a few things to consider. First, consider the size of the case. You want to choose a case that is large enough to hold all of your belongings comfortably, but not so large that it becomes difficult to maneuver. Additionally, consider the material of the case. As mentioned before, many cases are made with durable materials like polycarbonate or aluminum, which provide excellent protection for your belongings.


Black Jewelry Attache Case for Necklace / Chains, Rings and Bracelets

Another consideration is the type of wheels on the case. Some cases have two wheels, while others have four. Two-wheeled cases are generally easier to maneuver in tight spaces, while four-wheeled cases provide more stability and are easier to roll over rough terrain.


Black Jewelry Attache Case for Chains / Necklace / Ring / Bracelets

Finally, consider the features of the case. Some cases come with built-in locks or TSA-approved locking systems for added security. Others have compartments or pockets for additional storage or organization. Choose a case with features that meet your specific travel needs.


Glass Top Portable Jewelry Showcase Display Tray

In conclusion, traveling cases with wheels are an excellent investment for anyone who travels frequently or has heavy luggage to transport. By considering the size, material, type of wheels, and features of the case, you can choose one that is perfect for your needs. Whether you’re going on a short weekend trip or a long international journey, a high-quality traveling case with wheels can make your travels much more manageable and less stressful.

Jewelry Displays – So Sleek – So Chic

https://www.gemsondisplay.com

Intro

When starting a business, Etsy, Online Only, or Physical, jewelry displays are an essential element if you want to promote a feel of wholeness. Truly, when one looks at merchandise in general, when the items are haphazardly strewed on a table, people tend to overlook the beauty of your pieces. Not only do they showcase your products, but they also help create a visually appealing atmosphere that can attract customers’ attention and potentially increase sales. We are all bidding for this attention, and jewelry displays. Here are some key considerations when designing and setting up a jewelry arrangement.

Displays – A Necessity

https://www.gemsondisplay.com/steel-grey-leatherette-jewelry-ring-display-set–holds-23-rings-pd7699

Reflect on the type of jewelry and merchandise you are offering. I need not point out, displays are versatile. However a tailored display has a certain finished and precise look that feels whole, complete, and interesting. Long story short: it’s important to consider the type of jewelry/items you’re selling. Another aspect to consider is the energy/feel/look of your piece. A display should mimic and accentuate this style. An example: Delicate necklaces require a dainty display with hooks or loops, while chunky masculine bracelets may be best displayed on a padded t-bar or rugged show tray. Rings can be displayed on ring cones or in trays, while earrings can be displayed on earring cards or stands. It’s important to choose a display that not only showcases your jewelry but also mirrors the piece’s vibe.

Tailored to Your Style

https://www.gemsondisplay.com/collections-cl360

Cookie cutter displays are not a route to go with this task. Consider the materials and colors you’ll use for your displays. Touching back on point one, the hue and materials can add greatly to your overall look and add to your brand. In a single sentence here: The colors and materials you choose will depend on your branding and the style of your jewelry. Example. If your jewelry is bohemian or natural, you may want to use natural materials like wood or woven fabrics. If your jewelry is more modern or minimalist, you may want to use sleek metals, steel greys, or acrylics. The colors you choose should also complement your jewelry and be consistent with your brand’s color palette.

Add Lush Lighting

https://www.gemsondisplay.com/countertop-displays-pl62

Put your jewelry in an environment that best compliments your merchandise. For example: Lighting. Adding light is an important factor to consider when setting up a show case. Poor lighting can make even the Hope Diamond look like costume jewelry. Best to avoid that issue all together. Good lighting can make a huge difference in how your jewelry looks, so it’s worth investing in high-quality lighted fixtures. Also choosing a location that has plenty of natural light doesn’t hurt in tandem with lighted boxes or displays.

Organization – A Must

https://www.gemsondisplay.com/organizers-pl97

Keep it simple, and use common sense. Who wants to look at merchandise (even when it’s fabulous) if it’s thrown all over the place? When arranging your displays, it’s important to keep things organized and easy to browse. Avoid cluttering your displays with too many pieces, as this can overwhelm customers and make it difficult for them to find what they’re looking for. Instead, group similar pieces together and use signage or labels to help customers navigate your displays.

Keep it New

https://www.gemsondisplay.com/jewelry-display-sets-pl26

Displays, like merchandise should be freshy fresh. It’s important to regularly update your displays to keep things interesting for customers. We aren’t saying throw it all away, far from it. Just simply consider rotating your displays on a regular basis or changing up the props and accessories you use to showcase your jewelry. You could even rotate your displays out based on seasonal changes, which is a classic display strategy. This will help keep customers engaged and encourage them to return to your store or website.

Outro

In conclusion, jewelry displays are an important part of any jewelry business. By considering the type of jewelry you’re selling, choosing the right materials and colors, investing in good lighting, organizing your displays, and regularly refreshing your displays, you can create a visually appealing and engaging environment that will help boost your sales and grow your business.