Creating A Necklace Display

linen jewelry display

linen jewelry display

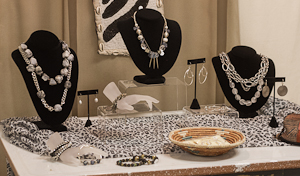
Crafting your necklace display is an important part of selling your jewelry. The presentation of your jewelry is what will draw potential customers in for a closer look (and then they’ll fall in love with your necklaces!). There are a few things that you can do to display your necklaces in an optimal way.

1. Remember height levels. There should be a tall, taller, tallest element to your display so that your customers’ eyes are able to naturally “read” the display. Believe it or not, it’s harder for people to focus on products when they are in a straight line with no height differentiation.

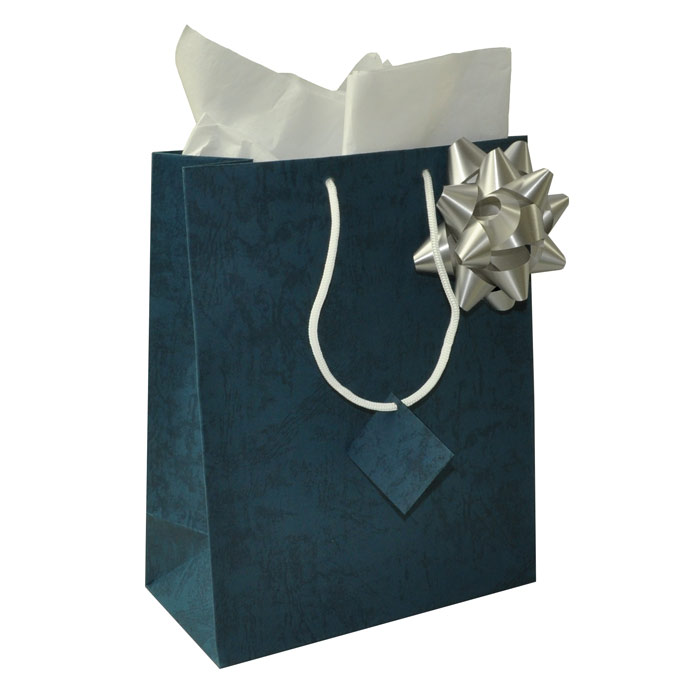
2. Color scheme and props. Your display is the story of your jewelry. When you’re crafting this story, you don’t want to use elements that don’t fit the theme of this story. Use props and a color scheme that will compliment ┬áyour jewelry and that will be coherent with your entire display.

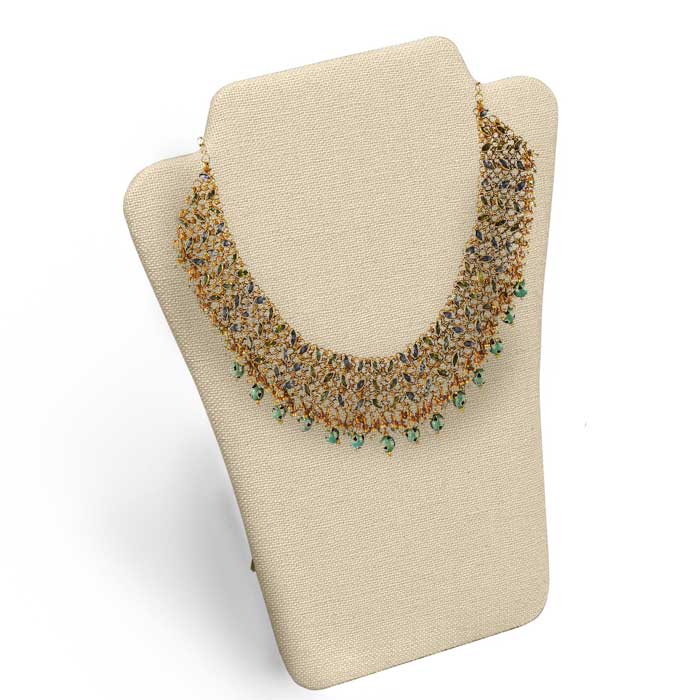
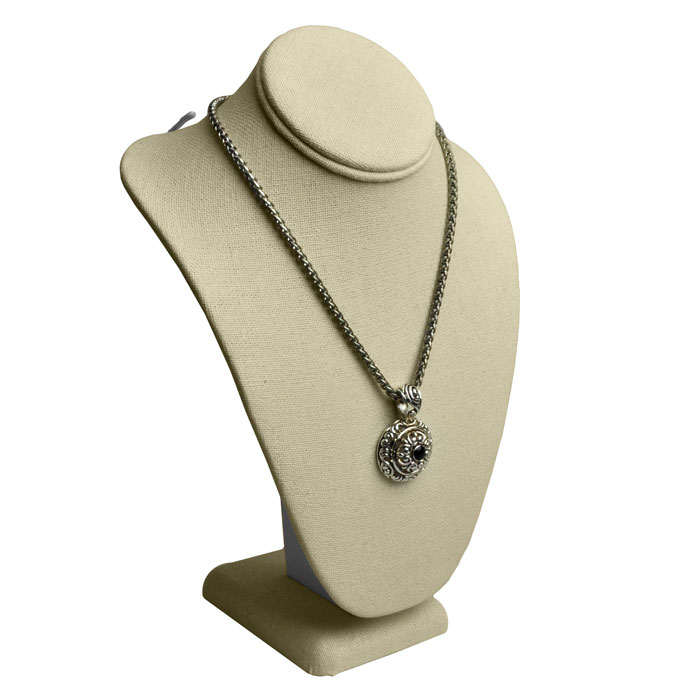
3. Pick a display that is the best fit for your jewelry. We wrote a post about this last time, but to recap briefly, you want to choose the right display for your jewelry’s style. Necklace busts and necklace easels are both great options, as well as wire displays, but each type of display has pro and cons. Be sure to research which type will be best for your jewelry.

Finally, just have fun! Creating a display shouldn’t be stressful or overwhelming. Relax, and enjoy the process.


Necklace Displays: A bust or an easel?

WhatÔÇÖs the difference between a bust and an easel? Is one necklace display better than the other? Which one will work best for YOUR products? There are quite a few questions to ask when putting together a presentation for your necklaces! We think it’s time you had some answers–at least about the difference between these two great necklace display styles.

HereÔÇÖs the deal:

Necklace busts work best for heavier jewelry or thicker necklaces or for displaying that isn’t going to be moved around a lot (such as a jewelry table in a store). Since the busts tend to weigh more than the easels, theyÔÇÖre often used for display tables in stores, or more elaborate and involved displays at art and craft shows (shows that last for several days). Unlike easels, busts are freestanding and do not pack flat. Although they are bulkier, they can hold heavier jewelry and have a very elegant, classic display look.

necklace display
Necklace bust.

Necklace easels are more lightweight, and work well for traveling to shows. TheyÔÇÖre also a great way to display chains with pendants, but might not be the best option for heavy necklaces. Easels will also work on a display table, as they are easy to arrange and don’t really take up much room. As the name implies, necklace easels have an easel back, which usually lies flat against the display when not standing up. The easel back is pulled away from the display and secured by another piece of the display that fits into the easel portion to keep the display upright.

necklace easel
Side view of a necklace easel.

So there you have it! ┬áBusts and easels are great ways to display necklaces, but the right one for you depends on your jewelry style, as well as where and how you’ll be displaying.

Pink + Red + Purple Packaging


With Valentine’s Day this week, we can’t stop dreaming in pink and red and purple–and we haven’t even shared our favorites with you yet! ┬áAlthough Valentine’s Day makes us think of pink, purple, and red jewelry packaging more than the rest of the year, we’re hardly limited to using these colors for just this month! We think these picks are perfect all year around.


PINK PICK: This hot pink glossy tote bag won’t go wrong any time of the year! Pair with tissue paper for a packaging look that begs to be remembered.


RED: This heart-shaped necklace box couldn’t be better for a romantic gift any time of the year! It’s perfect for that elegant pendant you’re displaying. Simply place the pendant in the center of the insert, secure the chain with the tabs, and place any excess chain in the bottom of the box. Nothing says “love” better than a heart-shaped box.

heart shaped box


PURPLE: It’s hard to pick our favorite purple product, but we’re going to have to go with our lavender flora satin ribbon. Tie a bow on top of any package with this help of this 5/8″ wide satin ribbon.


lavender ribbon


Image courtesy of mistermong / FreeDigitalPhotos.net


Winter Gift Packaging Picks

silver star bow

Brrr! As winter approaches, we’re thinking of sparkling white snow, hot cocoa with marshmallows, and most importantly, winter wonderland-inspired gift packaging. We’ve put together a few packaging options that remind us of the things we love most about winter, and hope that we spark some inspiration for your packaging this season.

We’re loving the following winter themes:

1. Starry nights. Can you picture it? A clear, cold night, with the stars shining brightly above? This linen tote in dusky blue with a silver star bow takes us right to happy memories of starry winter nights, which snow sparkling u. Use white tissue paper complete the pairing.

2. Cozy evenings by the fire. Another linen tote bag, this cheerful red pairs perfectly with a gold star bow┬áand white tissue paper. With this combo, you’ll have a a warm color to keep spirits bright during grey winter days, and the splash of gold from the bow will add some extra richness to the set.

3 & 4. Winter wonderland. Whether you choose one of these bags or use both for your packaging, the glossy tote bags in purple and navy make a dreamy winter combo! Pair these popular winter colors with white tissue paper for a complete gift packaging look.

gift packaging

purple gift bag

navy gift bag

Wrap It Up Contest Rules & Regulations

Wrap it Up!

We want to hear your favorite packaging products and your tips for how you make your packaging special.

Entry and Participation

Participants enter by commenting on Facebook with their favorite packaging product or tips. Additional entries may be gained by Tweeting or Instagraming packaging products or packaging tips with the hashtag #gemsondisplay and commenting on Facebook about these entries. Up to three entries per person.

No purchase is necessary for entry.

Facebook is in no way associated with this promotion and participants agree to release Facebook of all liability.

Age and Location Regulations

Wrap it Up Contest begins October 22, 2013 and ends at midnight on November 11, 2013.

Contest is only applicable to participants living within the 48 contiguous states who are 18 years of age and above.

Contest Sponsor and Promoter

This contest is sponsored and promoted by Gems on Display.

Sponsor and promoter address: 24516 3rd St, Grand Rapids, OH 43522

Phone number: (419) 830-3104

We reserve the right to use participant names and contest entry for publicity purposes only; no other information will be recorded or used without authorization. Winner will be contacted at the end of contest for shipping information.

All About Jewelry Tray Liners

jewelry tray liners

Need some jewelry tray liners for those trays? We thought so.

It can be challenging to know which liners you need for your trays (especially when there are so many options). To make it simple, weÔÇÖre broken it down into four main categories of tray liners: Compartments, Gemstones, Liners and Pads, and Rings.

Compartment Liners– These liners come with anywhere from six to fifty vertical or horizontal compartments and can be used for a wide variety of products such as bracelets, necklace, beads, stones, and much more. The compartment liners are useful for both display and organization.

Pro tip: Some of the compartment liners work especially well for specific display products; for example, the ten compartment tray liner (96-T1) fits the Glass Top Gemstone box (GB-0001) perfectly! Also, the 28 compartment liners are perfect for earring displays (item number BX565 fits right in there!).

Compartment Liners
Compartment Liners

Gemstone liners— the acrylic gem jar liners are ideal for gems, beads, charms, lockets, and much more! The gemstone liners are all the same dimensions, but have different sizes of jars depending on how many jars are in the liner. These liners range from 24-50 jars per liner for the full sized liners and 12 or 25 jars for the half-sized liners. The acrylic jars all have a foam insert, a pop on/off lid, and are set in a foam pad that comes in either white or black. Once placed in a jewelry tray, this makes for a fantastic display!

Gemstone liners
Gemstone Liners also work for beads, charms, lockets, and more!

Liners & Pads— excellent for an elegant and classic display. Velvet display liners are ideal for displaying, and a simple way to go from traveling to displaying without a extra hassle. Simply place your jewelry on the display pad or velvet liner in an attractive manner for an eye-catching display.

jewelry tray liners
Velvet Liners and Display Pads

Rings– Ring liners are available in two types. Foam pads with ring inserts, or as tufted tray liners. These come in full size or half size liners, and have a few different color options.

Ring liners
Pro tip: You can also use the ring liners to place on top of your jewelry in a tray to keep it from moving around during travel in a carrying cases.

Remember: liners go inside trays to make a complete display. Full size liners will fit in full size trays, and half-sized liners will fit into half-sized trays.

A Guide to Jewelry Trays

jewelry trays

jewelry trays

Have you ever tried to pick out a jewelry tray and gotten overwhelmed by so many options? If your answer is yes, this guide is for you! We know how challenging it can be to know where to begin when faced with a variety of options. Black or white trays? 1ÔÇØ deep or 2ÔÇØ deep? Wood or plastic?┬á Full size or half size? Trays, trays, trays! LetÔÇÖs begin to sort through the options, shall we?

First, letÔÇÖs visit the difference between half size and full size trays. Full size trays measure 14 3/4″ long x 8 1/4ÔÇØ wide, with different depths (which weÔÇÖll cover next). The full size trays will accommodate full size tray liners. Half size trays measure 7 1/4ÔÇØ x 8 1/4ÔÇØ and will accommodate the half size tray liners.

jewelry trays and liner

Tray depths.┬áStandard full size trays (the wood or plastic trays without lids) are typically 1ÔÇØ, 1.5ÔÇØ, 2ÔÇØ or 3ÔÇØ deep. The most common depth is 1ÔÇØ, but this really depends on what youÔÇÖre displaying and what look youÔÇÖre wanting to achieve. The 1ÔÇØ trays are fantastic for charms, rings, beads, or anything that youÔÇÖll be displaying with a tray liner. The deeper trays are great for displaying sunglasses, pouches, and other larger items.

Colors. Trays typically come in black or white. YouÔÇÖll want to choose the color that will best set off the colors of your products, as well as a color that will correspond with the rest of your displays.

Finally, should you choose plastic or wood? The plastic trays interlock, making them stackable. If youÔÇÖre also purchasing a carrying case and storing the trays in the case, or planning on traveling with your jewelry, the stackable trays can help make the mobile display process easier! The wood trays are wrapped in leatherette for a beautiful, finished look and are a great option for an elegant display.

A few side notes on trays:

-There are also a variety of trays that have lids for extra protection during display, as well a series of lightweight trays that work well for home shows.

-Looking for an elegant, premium tray? The aluminum tray with glass lid is an excellent option for the showcase.

-There is a series of trays made especially for showcase use. You can find the showcase trays here.

The next step to creating a display with a tray  is choosing a jewelry tray liner, which we will cover in our next post!


Fall 2013 Color Trends

purple kraft bag

Fall is rapidly approaching, and we can’t get enough of the Pantone Fall 2013 color trends! There’s so much one can do with these colors, whether it’s with packaging and displays, or incorporated in jewelry designs. From deep blues and purples to bright pinks to cool greys, these colors are just fantastic.

pantone fall 2013 color report
Fall 2013 Color Report

For packaging, we suggest using the dark blue or purple tinted kraft bags for packaging purposes. Paired with white or tan tissue paper, this would make a great fall packaging look for almost any style.

blue kraft bag

purple kraft bag

Loving the greys in this fall’s trend report? We don’t blame you. In fact, they’re one of our favorites, too. These greys work incredibly well as a display, since the cool color makes brighter colors pop while making subdued colors appear elegant (think black onyx or creamy white pearls).

earring display

If you’re wanting bright splashes of color for your packaging and displays this fall, you’re in luck. This fall’s color report is trending some pretty pinks that will bring you the color you need! You can go wild with this hot pink necklace bust, or add that splash of color to your gift packaging with hot pink euro tote bags.

pink euro tote

How to Get Customers in Your Booth (and keep them there!)

how to display
Use acrylic risers as an inexpensive way to create height levels in your jewelry displays!

Ever wonder why when youÔÇÖre at a an art or craft show, some booths have people crowded around them, while others are virtually empty? Or, more specifically, how to get people to notice your booth and then stay long enough to purchase something?

There are a couple of key things you need to accomplish overall, and then weÔÇÖll go into three specific ways you can increase your sales. These key things are the following: you need to catch peopleÔÇÖs attention, keep them interested, and make what you have so valuable to them that they canÔÇÖt live without it. How do you make this happen? LetÔÇÖs start from the outside of the booth and work our way inside.

1. An attractive booth. This is how you catch their attention. If you have a booth that is pleasing to the eye with carefully-selected, appropriate decor and signs, people will be more likely to both notice you and stop by to look. Use attractive fabrics, a clean tent, stylish signs, etc, to initially capture people’s interest. If the outside of your booth is attractive, they’ll want to stop by and see what’s inside.

2. Your product. This the first half of how you keep them interested (and part of how you give your product value). This needs to be displayed and presented in such a fashion that they are drawn in and want to keep looking. Do you have everything flat on a table so that itÔÇÖs boring for people to see and hard to distinguish between items? Or do you utilize varied height levels, appropriate displays, and lighting? Clearly price your items and have signs pointing to things of interest. This helps people to know where to look.

how to attract customers
A friendly face can go a long way toward making customers comfortable! (Image courtesy of stockimages at FreeDigitalPhotos.net)

3. You! This is the other half of keeping their interest and making your product valuable to others. Your body language and how you act when people enter your booth make a huge difference in how comfortable people will feel when browsing, and help to determine whether or not theyÔÇÖll feel like browsing. If youÔÇÖre sitting in a corner reading a book and ignoring the people who stop by, or greet them with a mouth full of food, they arenÔÇÖt going to feel welcome. However, if you greet them with a smile and engage them in conversation, theyÔÇÖll feel more at ease and therefore be more likely to make a purchase. Talk about the weather, share your creative process with them, show them one or two of your favorite pieces and ask them what they like or dislike (and then youÔÇÖll be able to guide them toward things that they will love!). Engaging people and showing them that youÔÇÖre not only passionate about your work but that you care about them will give your pieces value in their minds and turn those potential customers into actual customers!

What are some tried-and-true ways of attracting peopleÔÇÖs interest that have worked for you?

Layered Necklaces on Display

necklace display
Layering necklaces is easier than you think!

We canÔÇÖt get enough of this seasonÔÇÖs layering trend! HereÔÇÖs how to create a show-stopping display with this look.

1. Start with a statement piece. This can be a gorgeous pendant, a locket, or even a chunky bead necklace. It should be slightly shorter than your other layers and be different enough from the others that it catches the eye. This is the focal point around which you will build the other necklaces.

2. Add the remaining necklaces. These should be a mix of thin beaded necklaces or various chain necklaces. At least two of them should be the same length to give the look some width, and there should be at least two or three different lengths of necklaces for a complete layered look.

3. Tada! You have a beautiful layered necklace display. This type of necklace looks best on a tall display, such as our wood hand-carved necklace displays (shown above), or one of the 14ÔÇØ necklace busts.

Happy displaying!

Images courtesy of Arvind Balaraman at FreeDigitalPhotos.net and Coyote Beads