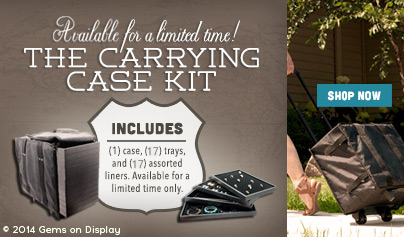
Traveling Necklace Busts

When you’re traveling to shows all summer, you need a display that makes traveling and setting up as easy as possible. After all, the less time you spend setting up, the more time you can spend selling. In addition to necklace easels, we have a couple of options for traveling necklace busts that are also great choices for displaying on the road. What travels light, pack nearly flat, and makes your life easer?

The Traveling Necklace Bust!

black necklace bust

This bust has a pop-out back. traveling display

Packs almost flat for easy traveling.

necklace display

And it doesn’t stop there. Try a combo traveling bust to display jewelry sets! Showing your customers pairing options in one place is a great way to get a bigger sale.

combo bust

The traveling necklace bust is also available in several other options, including a tall necklace display.

Need a display with less height? Another fabulous options for traveling is this pop-up necklace display, which packs flat and pops up to create a low profile bust. It works well for choker-style necklaces or thicker beaded necklaces.

low profile bust

What’s your favorite traveling necklace display? Browse more necklace bust options.

Necklace Easel Display Style

necklace easel

Necklace easels provide great displays with a lot of ease. (You know, an EASE-l. Get it?) Silly jokes aside, this necklace display is ideal for the summer months when traveling to shows, or for setting up on a jewelry display table where you donÔÇÖt have enough room for busts.

necklace display

Why are they so great for travel? Well, in addition to being lightweight, easels pack nearly flat, which really helps save on precious space during travel. Easels are the perfect accompaniment for chains, pendant necklaces, and thinly beaded necklaces.

necklace easel

Love to layer? Try a tiered necklace easel to create a beautiful layered look your customers will crave. You can be free to express your display style with necklace easels, as they come in a wide variety of sizes, styles, colors, and textures. What’s your favorite way to use necklace easels?

Getting Started with Jewelry Displays?

Just starting out selling jewelry and wondering where to start with your jewelry displays? It can be overwhelming to think about traveling with your jewelry, setting up a booth, and creating an eye-catching display table! We know you want to get started selling your pieces quickly, so weÔÇÖve put together just a few tips to help you get started displaying.

1. As a general rule, keep display colors and styles consistent. You can do this in two ways. First, by keeping the colors and materials consistent throughout your displays (all leatherette or velvet, for example, or all light colors or all dark colors). Second, by making sure your displays compliment your jewelryÔÇÖs style. If your jewelry has a summer beach feel, your jewelry would be better displayed on something like a linen display than on black velvet.

jewelry displays
Note: there is one exception to the above rule! For statement pieces, you’ll want a statement display. The focal point of your display should be a display that contrasts with your other displays and stands out.

2. Use appropriate displays for your jewelry. For example, would an easel or a bust work best for your necklaces? A finger or slot display for your rings? Do your bracelets work best on a T-bar, or do they need to lie unclasped on a half-moon or ramp? Each style of jewelry is best complemented by particular display styles (and sometimes even a mix of styles).

3. Remember to use different height levels. Keeping varied height levels throughout your display table (especially in groups of three with the ÔÇ£high, higher, highestÔÇØ elements) will help your customers be able to naturally read your table and easily find what you have to offer. By having everything on the same level or same height, itÔÇÖs more difficult to differentiate between products and your customers will have a harder time finding items–which means they may give up and look elsewhere.

Although these are a few general rules that help to make displaying consistent and simple, the more you go to shows and set up your displays, youÔÇÖll figure out what works for you (and youÔÇÖll come up with tricks of your own!). Best of luck as you get started displaying!

Hello, Summer!

Spring is nearly over and summer is just around the corner! Our thoughts have been full of summer displays and packaging ideas and our inspiration is coming from our new burlap jewelry display line and the chevron merchandise bags. What lovely items have been your inspiration this year?

The burlap jewelry displays are just dreamy a grainy, textured surface speckled with brown and beige makes these displays overflow with charm and character. Deep jewel tones really stand out against this background (were talking about those purples and greens and blues), although, if were really being honest, just about any jewelry style will be complemented by the burlap displays. From shabby chic to indie to rustic elegance, these displays will make your style stand out even more.

burlap jewelry display
Tall burlap necklace bust

And those chevron bags? Can we just say y-u-m? If your head isnÔÇÖt spinning with thoughts of summertime fun after looking through these bags, we donÔÇÖt know whatÔÇÖll get you there. They make us think of warm air, picnics on the beach, and juicy slices of watermelon. Each one of these six different colors makes us think of another summer memory. Pair any of the colorful chevron bags with either tissue paper or raffia for a cheerful summer packaging look.

chevron gift bag
Pair with raffia for the perfect summer look!

Let these beautiful burlaps display and chevron merchandise bags inspire your summer displays and packaging, and check out our full inspiration on our Hello Summer board on Pinterest.

Creative Gift Packaging

tissue paper

Packaging the items your customers have just purchased doesnÔÇÖt have to be expensive or complicated! There are a few ways to package that are simple, pretty, and wonÔÇÖt break your budget.

Drawstring Pouches

organza pouch

Pouches are an attractive and inexpensive way to gift wrap almost any small item. There is a lot of room for creativity or special edition packaging since pouches are available in such a wide range of colors and fabrics. Organza might be great for spring, velvet for winter, and a metallic silver or gold for the holidays. You can also keep packaging consistent by always using an organza pouch, but changing the colors depending on the time of year.

Raffia-wrapped Boxes

raffia ribbon

Cotton-filled boxes wrapped with raffia (or ribbon) are a great way to package! You can easily customize the colors to complement your branding, the season, product promotions and more.

Tissue Paper, Kraft paper, or Newsprint

tissue paper

Another creative gift packaging idea is to wrap your products in either a colorful tissue paper or in newspaper. Like the cotton-filled boxes, this method of packaging is easily accented with raffia of ribbon. Consider using an accent color or two that will match your logo, as this will help you with branding at a minimal cost.

What are some of your favorite creative ways to package?

Ring Displays for Wedding Season

ItÔÇÖs springtime, and love is in the air! ItÔÇÖs wedding season, and we know youÔÇÖre putting together some great ring displays. Want to know some of our favorites?

Finger Displays. This type of display is excellent for showing ring sets, or a line of wedding rings or bands. These work well in a showcase or on a jewelry display table, and come with a few options. ThereÔÇÖs the single ring finger display, the double, the five-finger and the 12-finger ring display. The smaller finger displays are best suited for wedding sets, or special engagement rings you want to set apart from the others. The larger displays work very well for displaying different styles of rings or organizing them by cut, carat, or color.

ring finger display
Dual ring finger displays are perfect for wedding sets!

Jewelry Boxes on Risers. This works very well for window displays and creates an elegant, eye-grabbing look that will draw your customers in for another look. Find a riser set and some high-quality jewelry boxes that matches your decor, arrange in your front window and display your rings!

jewelry risers
Jewelry boxes on risers are a great ring display!


Ring Risers. There are risers that are specifically created for rings. They typically have a ring flap, and you place the ring behind this ring flap to keep it secure. This look works well for both window displays and even inside of a showcase.

ring riser
Black velvet ring risers.


Slot Displays. This type of display is ideal for use within a showcase and perfect for  displaying a line of engagement rings or wedding bands.  These are typically angled displays, which makes it easier for your customers to view and browse your jewelry. Rings easily slide into the slots on the display, and are easy for you to remove and show to interested customers.

slot ring display
Five slot ring displays are excellent for a line of engagement rings or wedding bands.


Those are a few of our favorites! What are your favorite ways to display rings for wedding season (or any time of the year)?

How To Move Old Inventory

moving old stock
moving old stock
Image courtesy of Pong / FreeDigitalPhotos.net

Whether you do shows, sell your jewelry online, or have a storefront, ┬áweÔÇÖre guessing youÔÇÖve had inventory or stock that just doesnÔÇÖt seem to be moving. What are some good ways to get these items out the door? Keep reading for our tips on how to move old inventory.

1. Discounting. Consider having a discounted section, and placing these items in a specific location in your booth, whether it be a box, a stand, or a special spot on your jewelry display table. This will appeal to the bargain shoppers and might help move your inventory more quickly.

2. Featured Items. If you donÔÇÖt want to discount your products, consider creating a Featured Items section and place them here. Presentation is a key element in selling, and you can appeal to your customersÔÇÖ desire for something special by making a big deal out of these items. By bringing extra attention to these items (whether itÔÇÖs a unique jewelry display, extra table space, pretty signs, etc), you can help increase the perceived value of these items.

3. Giveaway. Consider running a contest or giveaway, and use some of your older pieces as the prize. There are a lot of ways you can do this! If you’re doing ┬álot of shows, have a giveaway in which you enter everyone who signs up for your newsletter. If you have a lot of engagement on Facebook or Twitter (or are wanting more), you can try a ‘Like (or Follow) to Win’ type of contest.

4. Repurpose the components. Examine the items that arenÔÇÖt selling. Do you still love them and stand behind them 100%? If yes, keep it, and try one of the other methods weÔÇÖve mentioned! However, if you donÔÇÖt, consider repurposing the piece. Take it apart and use the components to make new items, or tweak the product into something new.

5. Raise the price. Yes, you read that correctly! This little trick wonÔÇÖt work with everything, so use it sparingly. If you have a piece that seems to get a lot of looking or touching, but that just isnÔÇÖt selling, consider raising the price. This can help increase the perceived value of the product in your customerÔÇÖs mind, and just might get this piece out the door.

What are your favorite ways to move old stock?

how to move old inventory
Image courtesy of phanlop88 / FreeDigitalPhotos.net

Building a Relationship with Your Customers

building a relationship with customers
Image courtesy of stockimages / FreeDigitalPhotos.net

Building a relationship with your customers is an important part of a business. You can have a great product, but if you don’t have a good relationship with your customers, you’ll have trouble creating brand loyalty. It doesn’t have to be a daunting task to create a genuine relationship with your customers, and here are just a few of the many things you can do.

1. Be friendly (and be genuine). When customers are in your booth or store, don’t ignore them. Welcome them to your space with a kind smile and eye contact. Ask if they are looking for anything in particular, and point out the general layout of your store or booth.

2. Be engaging. You can engage your customers in so many ways in this technological age that this one shouldn’t be too challenging to accomplish. Not only can you engage customers when they are in your store or booth, but you can also be connecting with them online via social media outlets such as Facebook, Twitter, or Instagram, or through email lists. Share your favorite products with them, involve them in your design/creative process, and keep them updated on your products.

3. Be responsive. When you’re creating conversations with your customers, listen to what they are saying. People usually aren’t afraid to tell you what they do and do not like about certain products, and you can use this to meet their needs and create products they won’t be able to resist. Even if it’s hard, listen when they tell you something isn’t working.

Of course, there are so many more things that can be done to improve your business and create a relationship with your customers, but these three B’s of relationship building are a great place to start! What are your favorite ways to connect with your customers?


Cover photo image courtesy of adamr / FreeDigitalPhotos.net


5 Tips for Photographing Your Jewelry


If you sell your jewelry online, have a website showcasing the types of jewelry you offer, or have your jewelry on any form of social media, there’s a really good chance you’ve been frustrated at some point by photographing your jewelry. It can be very challenging to get everything lined up correctly to get a good shot, but there are a few things you can do to help get consistently good product photos.

1. Lighting. Lots and lots of light! Using natural light is always preferable, but we know this isn’t always possible. If you’re stuck with using unnatural light (such as your camera flash), consider using a flash diffuser to help diffuse the light and create a more evenly-lit product. (You can even create your own by placing a white plastic bag over your flash.)

2. Background. If you’re wanting an all-white background, look into building a lightbox with an infinity curve. There are many tutorials online for this. However, if you’re wanting to have a more natural look or shoot with a background that matches the style of your jewelry, just remember to use a background that doesn’t take attention away from your jewelry. Check out this great post at the Jewelry Making Journal for some fun tips!

3. Tripod & Timer. Using a tripod will make your photo sessions much easier, as it’ll keep the camera from moving at all while you’re taking close-up photos (close-ups increase the chances of there being motion blur). Setting the camera’s timer will maximize the effect you get from a tripod and keep it from moving at all while taking the photo.

4. Camera Settings. You know the little flower picture ┬áon your camera’s settings? This is the macro setting, and can help you take even better close-up photos of your jewelry. ┬áIt will narrow your depth of field, which will make your jewelry stand out against the background and really draw the eye to it.

5. ┬áEditing. There are a lot of photo editing programs available that don’t take an expert to use them! Editing your photos can make a world of difference in how they look. Minor things such as cropping and light adjustment can take an ok picture and turn it into a great picture. Give iPiccy or PIXLR a try!

Finally, have fun taking your photos! This is your opportunity to show potential customers your sense of style and point of view. Think of product photography as a way to tell a story with your jewelry.

(Cover photo┬áImage courtesy of stockimages / FreeDigitalPhotos.net. Post photo ┬® 2014 Gems on Display.)


Spring Displays & Packaging

Spring is on the way! We donÔÇÖt know about you, but weÔÇÖre counting down the days until the weather warms up and we can see the ground again. In preparation for springtime days, we are are thinking about spring displays and spring colors.

Pantone’s Fashion Color Report Spring 2014 is a great place to begin. This will help you to see what colors are going to be trending this season, and you can choose what will match your jewelry and style the best. It will also help you highlight your pieces that might be similar to these colors or provide you with design inspiration.

When choosing a color scheme for your displays, don’t go overboard and use ALL the colors. You want your jewelry to be the focus and your displays and props should serve only to bring attention to your jewelry. And when you’re choosing your spring packaging line, remember that packaging is branding. You want to create a look that customers will associate with your store even after they’ve gone home.

Parade blue (very similar to the Dazzling Blue Pantone is featuring this spring) tissue paper paired with turquoise makes a memorable packaging look.

We know how many of our customers travel to shows, and one of favorite products for spring is this brand new carrying case! This black aluminum case has a front opening door with a pocket on the inside of the door, a hidden retractable handle, combination locks, and an adjustable divider. Holds up to (12) 1″ trays.

spring displays

For more color inspiration for this spring, check out our Pinterest Bring in Spring board.